Project Checkpoints
Checkpoints are the core of the Projects system. They are used to track changes to your files and are the starting point for releases. You can think of a checkpoint as a snapshot of your files at a given point in time. If you're familiar with Git, a checkpoint is similar to a commit (This comparison is not exact, but it's a good starting point).
Checkpoints can have Change Notes, which you can use to track features, bug fixes, or other changes to your files. Change Notes are optional, but highly recommended.
Creating a checkpoint
To run a checkpoint, you can click the "Create Checkpoint" button in the project dashboard or the Checkpoints tab in the project.
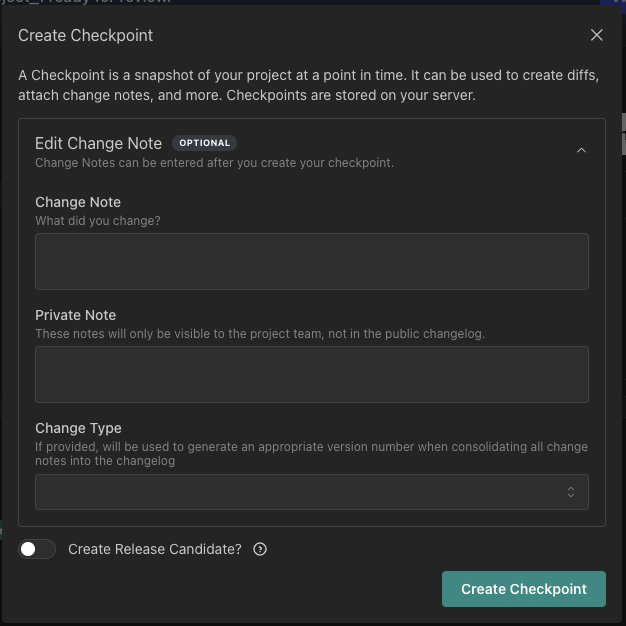
This form will give you an option to add a Change Note. Change Notes have a few different fields:
- Change Note: The text of the note. This text will be added to the Changelog when you create a Release.
- Private Note: Notes for this checkpoint that you may not want to add to the Changelog (ie. internal development notes).
- Change Type: The type of change (patch, minor, major). This is used when you make a release to determine the new version number. Patch changes are for bug fixes, minor changes are for new features, and major changes are for breaking changes. (See Semantic Versioning for more information). The SemVer guidelines are often not truly compatible with FileMaker applications, so use your best judgement when choosing a change type.
All of these fields are optional, but the Change Note and Change Type are recommended.
After you create a checkpoint, you'll be redirected to the Compare tab where you can see the checkpoint you just created, as well as the changes to your files that happened since the last checkpoint.

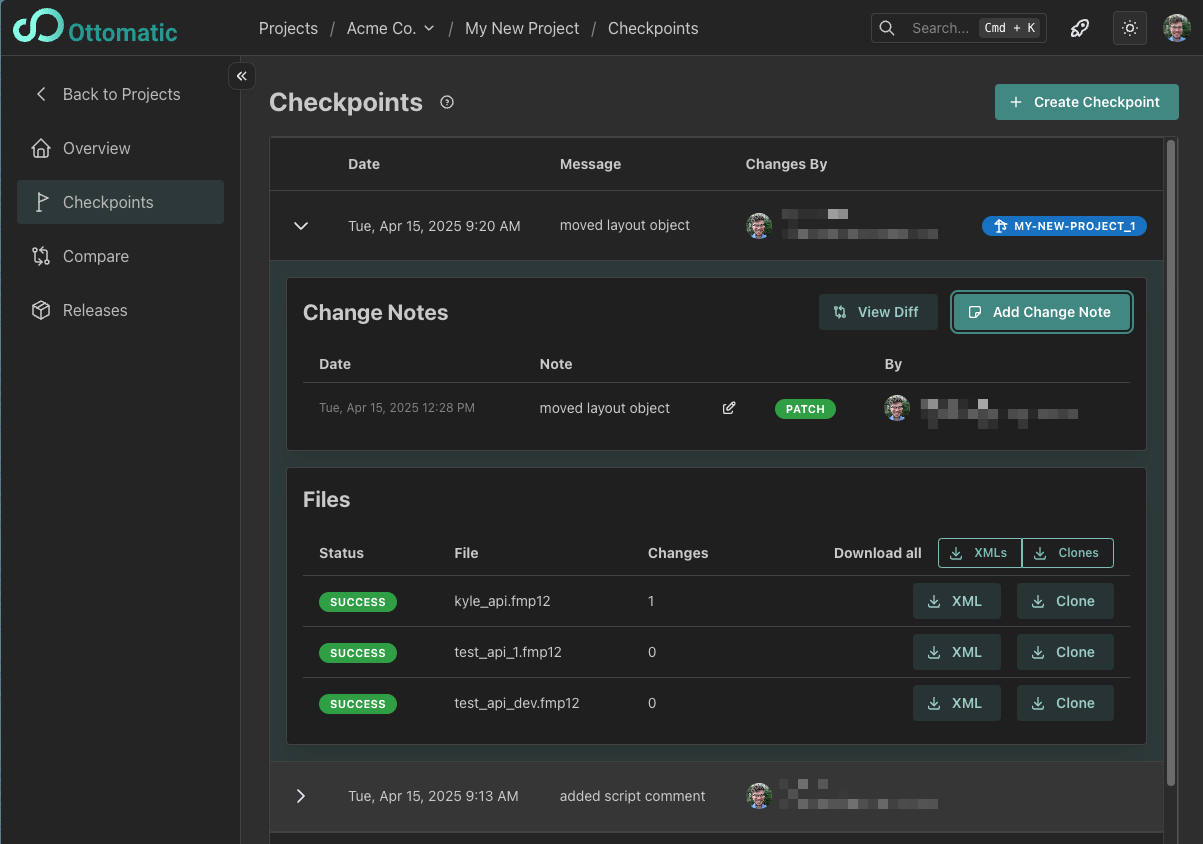
Viewing checkpoints
You can view all of the checkpoints for a project by clicking the "Checkpoints" tab in the project. This will show you a list of all the checkpoints for the project, including the Change Note and Change Type for each checkpoint.
Comparing checkpoints
You can compare two checkpoints by clicking the "Compare" tab in the sidebar and selecting the two checkpoints you want to compare. This will show you a list of the changes that have been made to the files between the two checkpoints.
If you'd like to see a more detailed breakdown of the changes between two checkpoints, you can use FMComparison on the XMLs of the files. We're planning on bringing a more extensive diff feature to Ottomatic Projects in the future.
What happens during a checkpoint?
When you run a checkpoint, the following happens:
- A Clone is created of each file in the project.
- A XML is created of each clone.
- Ottomatic will parse through the XMLs of your files and build a representation of the state of the file that is more easily diffable.
- A diff is created between the new checkpoint and the checkpoint before it.
The clones and XMLs are saved to the server and can be downloaded from the checkpoints tab.
Troubleshooting Checkpoint Issues
If you're having issues running checkpoints, you can check the OttoFMS logs for any errors or messages at the time of the checkpoint. OttoFMS will log the process of checkpoint creation, so you can see where it may have hung or failed.
If you can't find the issue or are unable to fix a found problem, reach out in the Ottomatic Community and we'll be happy to help you out!