Getting Started
Welcome to Ottomatic Projects! This guide will walk you through the process of setting up your first project.
Setting up your First Project
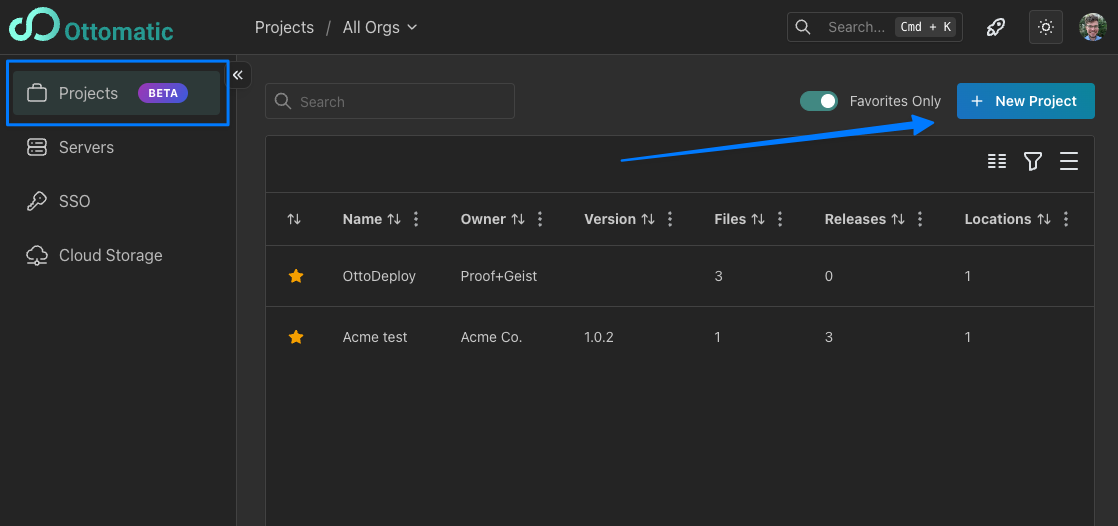
To set up your project, head to the Projects page in the Cloud Console and click "Create Project".
Here you will be guided through project setup, first setting general options, then adding you development server and your file set.
General Settings
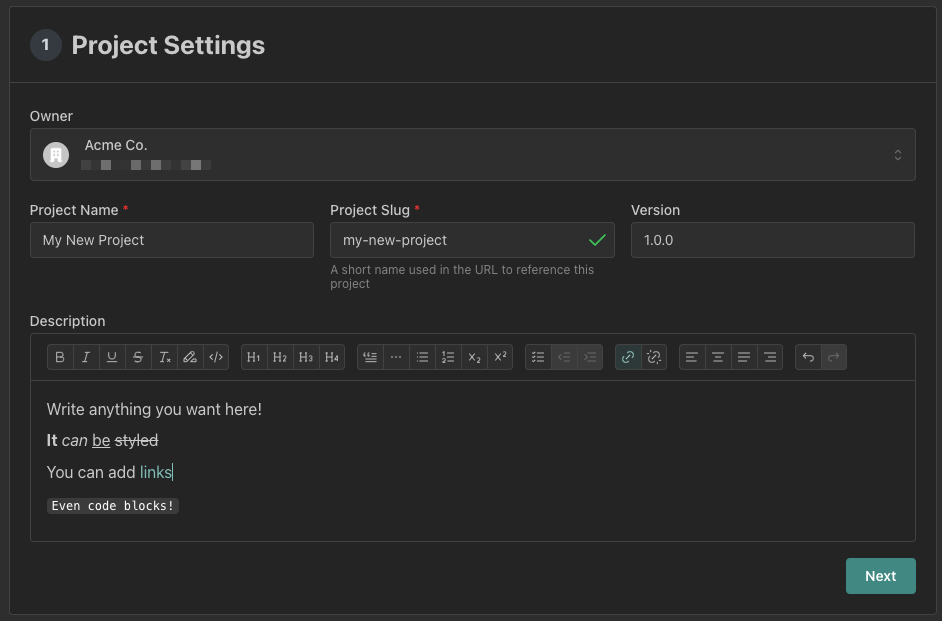
In the General Settings section, you will be asked to provide a name for your project, a description, and a to set an initial version number.
The Project Name is used to identify the Project in the Cloud Console. The Description can be used to provide more information, add links to external resources, or anything else you'd like to add. The version number is used to identify the version of the project. Your version number is required to follow simple Semantic Versioning requirements, which the Cloud Console will use to version your project later on. If you don't have an existing version number, you can use the default of 1.0.0.
Selecting Files
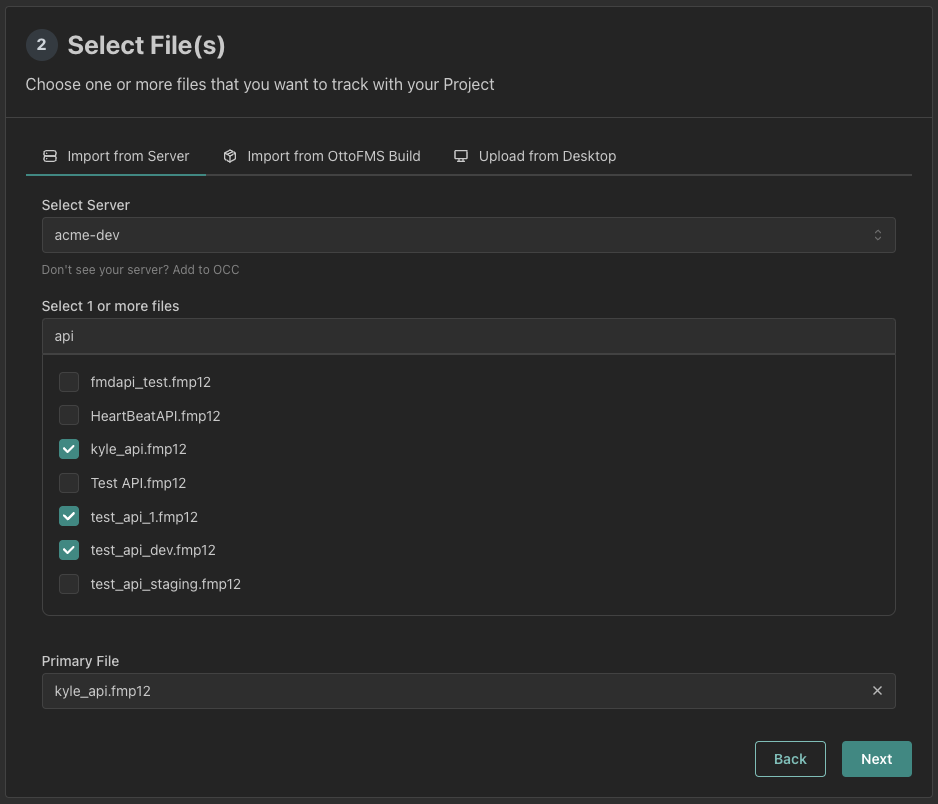
Next you'll be asked to choose the files that your project will use. For now, you'll start by selecting a server that is connected to the Cloud Console and choosing a set of files from that server. We recommand that you select the development server for your files as Projects work the best on the server you're doing active development on.
Whichever file you select first will be auto-selected as the primary file for your project. If you want to change this, you can do so at the bottom of the file card. The Primary file will have a more prominent display in your project's dashboard, so we recommend selecting whichever file you launch the most.
Adding your Files' Credentials
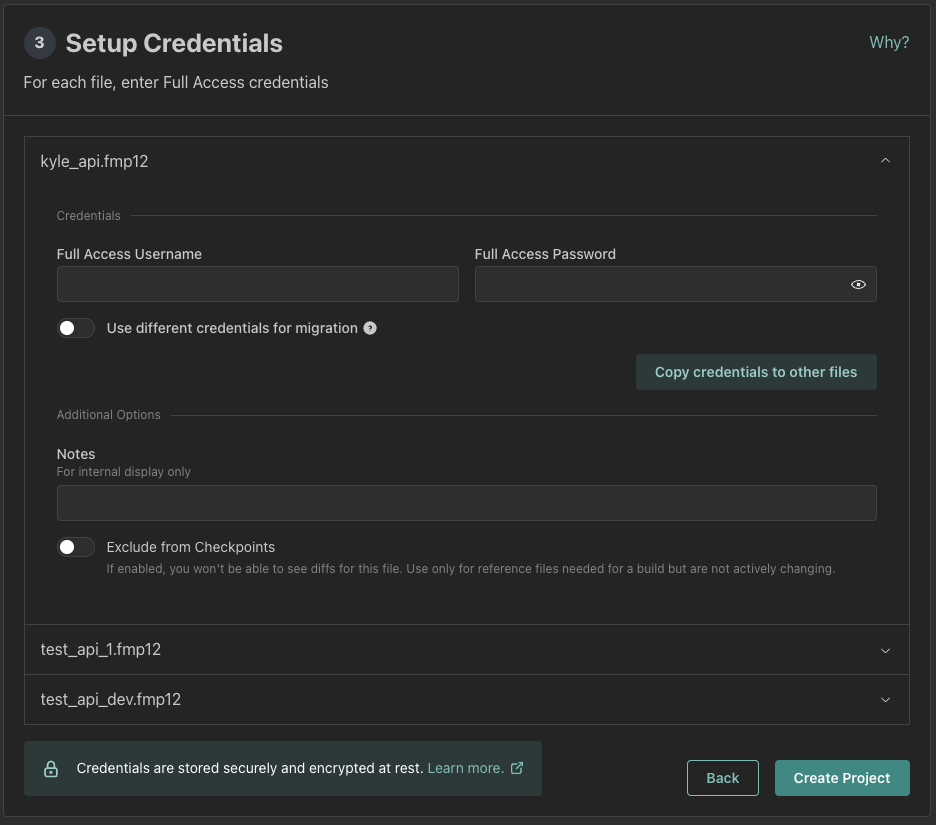
Finally, you'll be asked for your file credentials. As part of running checkpoints on your project, clones and XMLs of your files will be created. In order to properly run checkpoints, you'll need to enter Full Access credentials for your files. If you'd like to use a different set of credentials for deployments with your Project (Coming Soon), you can toggle the "Use different credentials for migration" option.
On each file you can add notes to help you remember what the file is for, or any other information you'd like to add.
You can also optionally exclude a file from being included in checkpoints. This is useful if you have files that are important to be included with the project for grouping or organizational purposes, but you don't want to track changes on them.
Once you've added your files and set your credentials, you can click "Create Project" to finish setting up your project.
Running your First Checkpoint
Once you click the "Create Project" button, you'll be redirected to your project's dashboard, where you'll see an initial checkpoint already running. If you don't see it, you can click the "Create Checkpoint" button in the bottom right to start it manually.
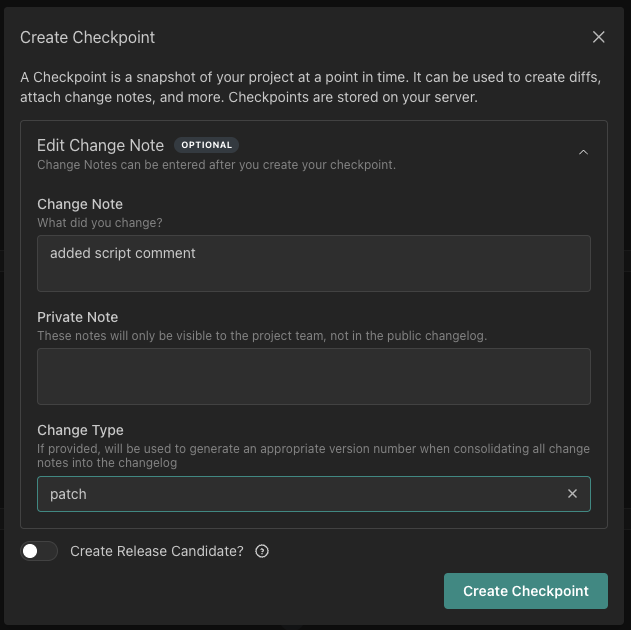
This checkpoint will be used as a baseline for any changes you make to your files. Try it out by making a change in your file (something as simple as adding a comment in a script will work). Once you've made a change, you can create a new checkpoint to see the changes in your Project.
Once you've done some more development, you can create a checkpoint to see the changes you've made to your files and add change notes.
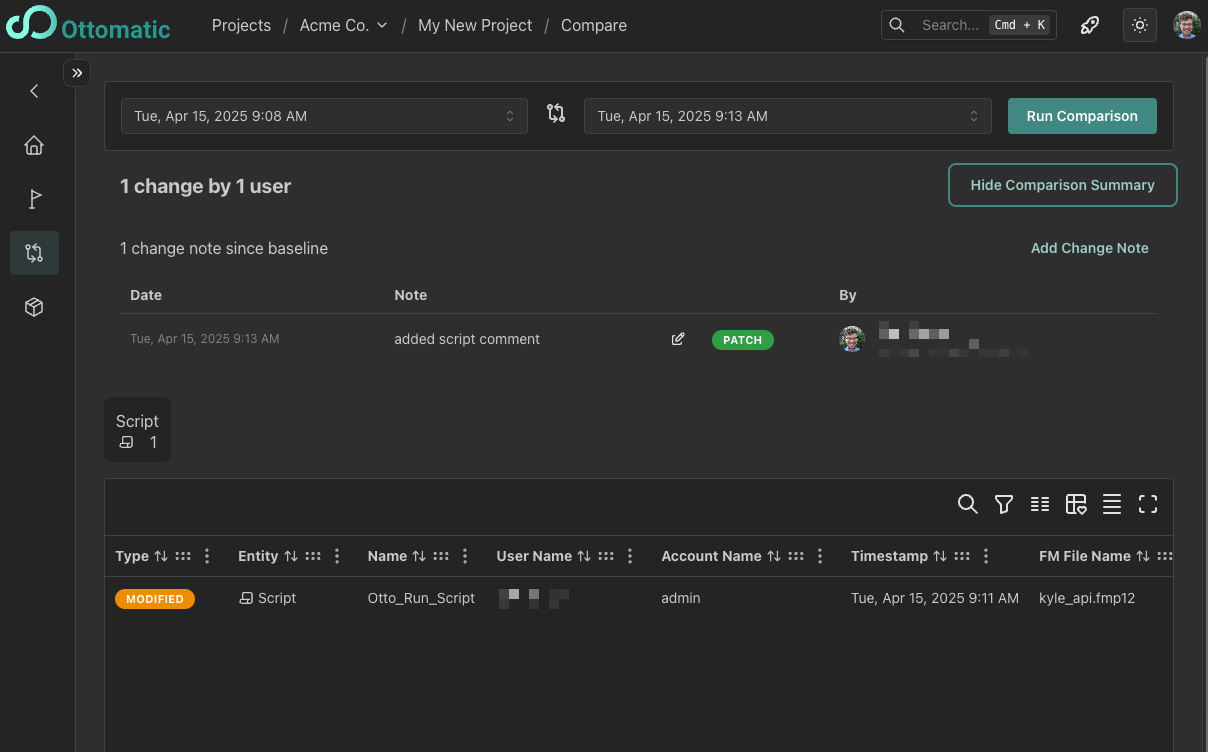
After checkpoint creation, you'll be redirect to the "Compare" tab, where you can watch your checkpoint run and see the changes made in your files.
Create your First Release
Now that you have change tracking for your project, the next step is setting up a release! Releases are how you'll deploy your file changes from your development files to your live files. To get started, you can clikc the "Create Release..." button in the project dashboard or releases page. You can also start by toggling the "Create Release Candidate?" switch in the checkpoint creation form.
Releases are created in a two step process. First you'll create a "Release Candidate", which is a checkpoint with an accompanying OttoFMS build. This Release Candidate can be used to send your changes to a testing server. After any validation is complete, you can create a release from the Release Candidate.

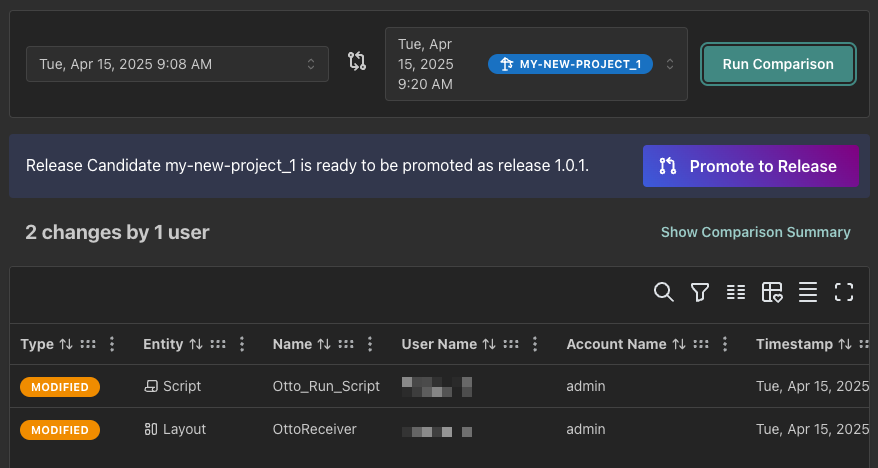
After release candidate creation, you'll see a banner at the top of your project letting you know that you have a release candidate waiting to be released.

Clicking the "Review & Promote" button will redirect you to the compare tab, where you can review the changes made in this release candidate and promote it to a release.
Once you've reviewed the changes and are ready to promote the release candidate, you can click the "Promote to Release" button. This will pop up a form where you can set the release version and edit the generated changelog.
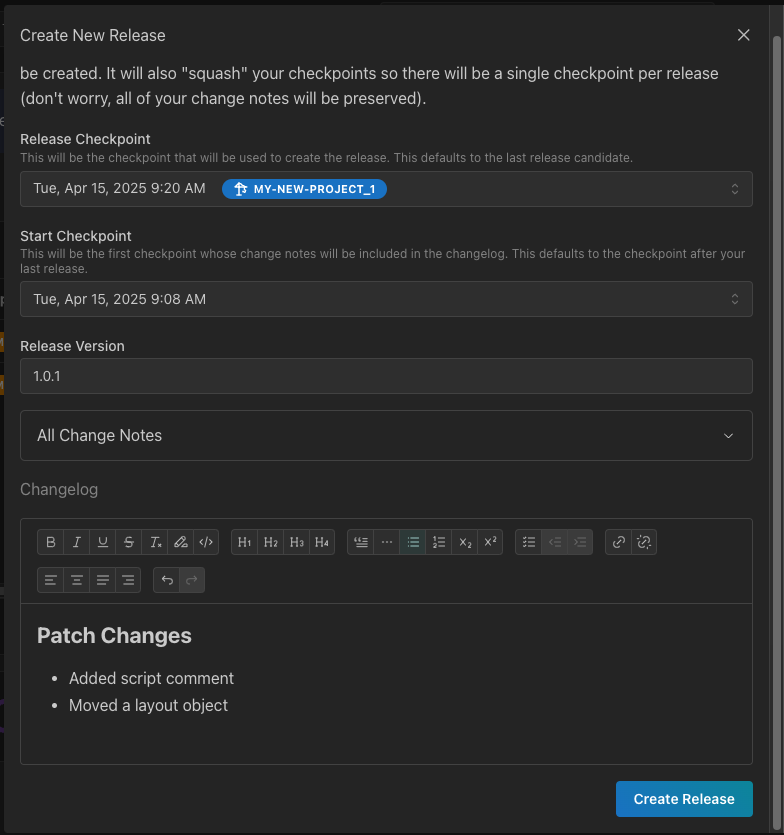
Once you're happy with the new version and changelog, you can click "Create Release" to finish creating your release.
When you create a release, a few things will happen:
- A new release will be created in the Cloud Console. Cloud Console releases store your Changelog and can be "published", which will allow you to send others a link to the list of changes that you made in this version.
- The release candidate will be promoted to a release. This will tag the checkpoint with the release version and make it immutable.
- Previous checkpoints will be "squashed" into the new release. This will combine all the checkpoints into a single release checkpoint to save space and simplify the checkpoint history. All change notes will be combined onto the new release checkpoint, so don't worry about losing your notes.
Once the release is created, you'll be redirected to the release's page, where you can see the release details and history.
To deploy the release, you can select the build in OttoDeploy and send it to any server you like! Deeper integration with deployments in projects is coming soon, so stay tuned!
Next Steps
Now that you've got your first project set up, you can start using Projects to manage your file changes and releases!
Check out more detailed information on Checkpoints, Releases, Tools, and Project Settings to learn more about how to use Projects.